Hispanic Heritage Month Meet your #Maker 

Last year we celebrated Hispanic Heritage Month in our high school makerspace. Our ELLs (English Language Learners) made paper flowers practicing following directions, new vocabulary including names of colors all with beautiful results. We also made piñatas with foreign language classes where students had to keep in mind they were engineering to fail as the purpose of piñatas are to break. We’ve all been there when a piñatas refuses to break even though beaten unmercifully. Too light on the tape and they fall apart before you hang them up. Too much tape, well forget about getting at the candy.

Piñatas:The original piñata was shaped like a star with seven points. The points represented the seven deadly sins, and the bright colors of the piñata symbolize temptation. The blindfold represents faith and the stick is virtue or the will to overcome sin. The candies and other goodies inside the piñata are the riches of the kingdom of heaven. Thus teaching that with faith and virtue one could overcome sin and receive all the rewards of heaven.” We’ve come a long way in piñata design.

We not only made piñatas again this year but also expanded the celebration and learning to other cultural items such as worry dolls, typical of Guatemala and Peru and calaveras (skulls) a prominent feature in Day of the Dead celebrations.

Worry Dolls: According to the Mayan legend, when worrying keeps a person awake, he or she tells a worry to as many dolls as necessary. Then the worrier places the dolls under his or her pillow. The dolls take over the worrying for the person who then sleeps peacefully through the night. When morning breaks, the person awakens without the worries that the dolls took away during the night.”  Perfect for our stressed out teens!


Calavera:  “Calaveras are whimsical caricatures-most commonly drawings- of skulls or skeletons.” Look at the individuality and creativity!


Our celebration included building an ofrenda (an altar in honor of the dead. RIP Selena.) I learned that November 1st is a day honoring children and November 2nd is the day honoring adult spirits. I mistakenly thought the spirits were all honored on one day only.


Cultural literacy is important and as such is part of the Foreign Language curriculum. The activities were available to anyone, students and staff, regardless of scheduled class participation. Anyone could stop by the makerspace during the day and participate as we all benefit from a global cultural education. I also believe one successful program leads to another…

So now the Italian teachers approached me stating, “You know Italian Heritage Month is also celebrated in October, Gina.” There’s an emphasis on ‘Gina’ as they know I’m of Italian descent my father having emigrated to NY in his twenties. It’s amazing, I didn’t have to seek out the department to work on a project together; they contacted me! It’s wonderful to collaborate with enthusiastic teachers and I’m looking forward to using and highlighting maker activities to celebrate Italian heritage. So stay tuned, blog post on the events coming soon.

For instructions on how to create the items listed above, check out my HHM Libguide at http://hslibguides.islipufsd.org/HHM

Why Sustainability is Crucial for the Maker Movement: and vice versa

sustainability 
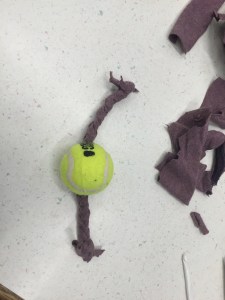
Creating something gives you a special feeling. Take a bunch of random objects and violà you have created something else. The problem with making is that sometimes it can cost a lot of money. We’re always looking for funds or swiping our credit cards. Constant trips to the local craft store. Can we support this type of making in our makerspace programs? We can if we look to the sustainability movement. Believe me, you can get a lot done with cereal boxes, jars and cans, old fabric, even dead tennis balls from your high school tennis team.

According to the EPA, “Sustainability is based on a simple principle: Everything that we need for our survival and well-being depends, either directly or indirectly, on our natural environment.” (To learn more about sustainability and how you can help, click here.) Many items end up in our landfills that could otherwise serve an additional purpose. These discards have an impact on the environment. We can upcycle by converting old or discarded materials into something useful. This is a great way to reuse materials and reduce our footprint, thus having a positive impact on the environment by removing items from the global garbage accumulation. It’s not just the excess garbage in our landfills that we need to worry about, but also the waste and energy required to make and transport newly made supplies to our local Michael’s, Jo-Ann’s or other craft store. Think of all those 18-wheel vehicles barreling down the interstate. Then we need to jump in our cars and drive over to the store to gather our shiny new supplies. Which, even with clipping coupons, costs us a pretty penny. Can we continue to do this indefinitely?

120423050950-lebanon-landfill-horizontal-large-gallery

Still not so sure about this? Here’s what I propose, let’s combine the two (Sustainability + Making) and upcycle some common objects. Here’s just a few ideas to get you started in realizing how really simple this can be. There are numerous ideas online once you decide to take it further or you can look at some ideas on my Compassionate Maker webpage or makerspace themes page.

 Some ideas using fabric… 

Between myself, my husband and our four children we have lots of t-shirts. You know the collection – ones from vacations, some from other people’s vacations, and the never ending supply of yearly school sports team tees. (Just in case you don’t have the volume of tees that we do, it’s easy to call for donations. My library makerspace has a stack of at least 50 t-shirts. There’s someone, somewhere who wants to clean out closets and draws.)

T-Shirts

no-sew tote bags


scarves

braided dog toys

3-DIY-braided-dog-toy-dogvacay


Jeans

There’s always a supply of jeans. Someone is always gaining weight (that would be me) or losing weight (not me). We have a yearly call for jean donations in our school.


bags

jean bag

-braided dog toys; see above (any fabric will work – denim, t-shirts, old towels)


Fleece

Your kids no longer like their “fill in the blank/former popular character” fleece blanket? Turn it into a pet bed or dog blanket. Instead of going out and buying Poly-fil stuffing, stuff the bedding with poly-fil from an old pillow or use t-shirts. (Yeah, I have a lot of t-shirts…)

fleece bedding blanket

For more animal related activities click here. Did I mention I have two Shi-Poos?

Other assorted items…

Got Balls? 

Used tennis balls make a dog very happy. Just cut a slit at both ends and insert braided fabric (see above). Fido is now busy and content and you didn’t need to gas up the car and drive over to Petco/PetSmart. dog toy


See that wasn’t so bad. Easy peasy. Hopefully by this time I’ve motivated you to upclyle a few household items and help save the planet in the process.  I use some of these activities when human impact on the environment shows up in the curriculum. While these ideas are great to use individually, hopefully you’ll bring similar ideas into your makerspace and give your students another more physical and tangible angle to the curriculum they are reading about in their classrooms.

keep-calm-and-up-cycle-1


Left Behind: Makerspace Surprises

CharlieBrown-LifeIsFullOfSurprises2

The makerspace at Islip High School Library is an active part of our school. Students drop by during their lunch periods throughout the day to tinker and explore the many resources. I like this open format, though I do have scheduled classes come in too. The openness not only reflects the students’ ability to use the space but also their wishes and desires to discover activities and projects of interest to them. That’s the best part, I think. The freedom to learn on demand.

My husband tells me I don’t like surprises. I guess that’s true. With four kids and two dogs what working mom likes surprises? Well, maybe if I arrived to a clean home with dinner prepared…Not. Most of my gifts are chosen from my wish list or outright selected by me in the store and handed over for giftwrapping and later ‘surprise’ presentation. Yes, I’m that predictable.

I’m going to focus and stay positive as there were a few negative surprises this year. Most notably when we moved the bolted bookshelves of twenty years during construction work. Yuck. Though this shouldn’t have been a surprise really, I have had a refrigerator moved once or twice.

schmutz during construction

There were two surprises this year that really got me. The first surprise was when I entered the library after returning from lunch to spot a mass of color left behind on the one of the tables in the makerspace. Walking over I was a little annoyed that someone left a mess and expected me to clean up. The closer I got I realized I was in for a pleasant surprise. Someone left behind a rainbow of origami cranes. Wow. Thank you.

My next surprise, and perhaps my favorite, was spotting a hidden message on recycled newspaper after a maker activity with a group of students. We use the previous week’s WSJ, NYTimes and USAToday to cover our library tables and protect them from paint and hot glue. This day, mixed in with the remnants of hot glue droppings, the following message was left behind, “I ‘heart’ school”. Awesome. It was literally in the garbage before I realized what I had. Quickly salvaged the newspaper now hangs in my office.

I heart school

I love our library makerspace and maybe I like surprises, too*. There I said it.


*I’m still keeping my wish list current at the local jewelry store!

Hacking Directions

To follow or not to follow. That is the question we ask ourselves when embarking upon a new project.
This past month students at Islip High School created wind tubes and marble runs in our library makerspace. Like all good ventures we sought out instructions, purchased supplies, cleared a work space, and got busy.

Instructions, like recipes, are sometimes spot on and other times well, let’s just say not so good. I’ve posted pictures of our creations and many have contacted me inquiring about the materials we used. So here’s a summary of our success and failure.

Let’s start with the marble runs. We used the directions from The Exploratorium.


Here’s an annotated list of the materials needed/used:

Dowel rods (not very successful) had a hard time getting them in and out of the pegboard holes and gave up and used traditional pegboard hooks.  Each dowel (36 inches long) was 98 cents (Home Depot) and a package of 50 clothespins was available from the Dollar Store. The box of 50 assorted pegboard hooks cost $6.99 from Harbor Freight.  To use the metal hooks you’ll probably need to hack a bit – use tape to secure or if using plastic, like water bottles, a hole-punch works well.

Spacers – The sizes listed were perfect but you really need to find straight, better quality wood than some of the pieces we got stuck with. We had some issues with warped and knotted wood. Be careful when selecting wood. Those of you who work with wood probably already knew this. I did not pay close attention and had to purchase a few extra pieces.

Pegboard – There are two options and we used both as we were making 6 marble runs. A 2X4 precut pegboard is available for less than $8 each board. Or, you can get a 4X8 pegboard cut into 4 boards; this runs about $20. We found that one of the boards didn’t align because it wasn’t cut accurately. So it’s cheaper but you need to be aware of cutting it properly or you have to go out and buy more boards. I still have an orphan pegboard that is waiting for some project.

Started with nails and quickly changed to screws.   Hammering was loud (really loud), the drill was less noisy and quicker. Guy at the hardware store offered nails so I listened. We should have stuck with the instructions… 

Wood glue – we used on two or three of the boards but not all. The screws were really secure. Let’s just say it didn’t hurt and  didn’t seem to help.

The wood base, unfortunately listened to the guy at Home Depot and went with a smaller size (4″ instead of 6″ high). Later tried the size in the directions (6″) and that worked beautifully. We were able to get three screws in to attach the base instead of two making it more secure and sturdy.

 We then made  wind tubes. We used the following instructions from The Exploratorium.


Here’s an annotated list of the materials needed/used:

Fans – Had to send fans back because they were really large. We thought that 18″ meant the blade, not over all. Of course that makes no sense with a 14″ hoop, but we did it anyway. So the first set purchased was the Honeywell HF-910 – too big. We then finally settled on Honeywell Model  HT-900. 

14″ embroidery hoops – perfect. Got these at Michael’s a local craft store that gives teacher discounts.

Acetate – ordered size from listed on the directions and it worked beautifully.  Kind of expensive so after this I thought I’d try out alternatives such as a ‘dollar store’ plastic tablecloth and lamination film (something that’s usually readily available in almost all schools.) After testing out the lamination film (1.5mil) it was just too flimsy and wouldn’t hold up. We ran it through the lamination machine (empty) once. Perhaps if one had a thicker film or ran the sheet through the laminator an additional time it might have been thicker/stiffer/better; I did not test this out. I also did not have time to test out the plastic tablecloth. It is thicker than the lamination film but not as stiff as the acetate we ordered. One note regarding the plastic acetate and getting the hoops around them – you need at least two people, preferably three; small hands and long arms better.

I didn’t use the wood blocks listed in the directions. I used a curtain rod instead. By this time we were tired of cutting/sawing and I wanted a non-messy quick fix. The adjustable rod was more expensive (double the cost) of thin wood or PVC pipe, but this was my choice. Sometimes time and aggravation are best alleviated by a few dollars. (I got this idea from Harris County Public Library.)


We used clear plastic book tape (packing tape is good too) to attach the curtain rod supports.

The tubes are very light but sturdy enough to handle some abuse. We used them at our local maker expo (SLIME: Students of Long Island Maker Expo) and they held up under under heavy use for hours.

img_4258

While all this was going on, I remembered a trip to the Children’s Museum in Portland, Maine where my children used to play with a wind device that balanced a beach ball using the force of air. I surmised I could figure out how to make one. How hard could it be? I had Staples Reward dollars that were going to expire in 24 hours so I picked up the Honeywell Turbo Fan Model HT-908, oaktag/poster paper and packing tape. It’s that simple. Tape the thick poster paper onto the fan creating a tube. Go to the Dollar Store and find an inflatable beach ball. Voila! Bernoulli’s Principle easy peasy. (I had to find small beach balls to accommodate the small fan. Larger fan – larger beach ball…)


All in all it was great fun and a unique learning experience. Sometimes we follow directions and that’s what’s best and other times it’s better to adapt and hack.

*I list the stores not as an endorsement but to let you know our process, have a visual, and have an estimate of costs.

**See also Blog post on Power Tools in the Library

My Circus, My Monkeys!

Maker Expo Librarian Style!

Number of activities: 70
Number of towns represented: 65
Number of participants: 600
Price of admission: $0
An exhausting, fun filled day of inquiry and making – Priceless!

I’ve been to several Maker Faires® – New York City, Washington (DC), Rochester (NY), and even the Barnes & Noble Mini Maker Faire held in stores nationwide (Bay Shore, Long Island) where I ran a table of activities. Last year, my colleague, Kristina Holzweiss, and I traveled to the inaugural National Maker Faire in DC where we ran a booth for two days working with children to create lasting memories with recyclable materials. Exhausting but rewarding. We even got to meet Dale Dougherty, CEO and Founder of Maker Faire & Make Media. Well actually, we kind of jumped him at the end of the two-day event when everyone was packing up to go home. Tired as he no doubt was, he graciously spoke with us and took photos. Did I mention it was 95⁰ and humid all weekend? Thank you, Dale for humoring two insane librarians from NY.

Dale kris me

Last Saturday, May 7, 2016 we hosted our 2nd Annual Maker Expo, SLIME. Students of Long Island Maker Expo (SLIME) is an interactive Day of Making where participants experienced hands-on activities that promoted imagination and creativity. From recyclable crafts to robotic technology, together families had fun learning new skills and making new friends. SLIME celebrates the creativity and innovation of Long Island students k – 12. Students made items to take home, items to donate, participated in hands-on learning activities, and watched demonstrations.

So why is this maker event different from all others? (Sorry, as I write this I’m still finishing off the last of the Passover matzah.  Some of you got this reference, some of you will have to google it 🙂 )

Well, first off – we’re librarians!!!

  • Librarians like to share and like everything in a library, we give it away for FREE. Kristina spends all year writing grants and together we track down sponsors. Some sponsors give cash, some swag. There’s another librarian trait…we’re always scrounging for funds! We’ve never charged admission or for any of the maker activities offered.
  • We focus on providing enriching opportunities for our community, in this case Long Island (NY). Kris and I are from two separate school districts and we invited all on Long Islanders to participate. We even had a librarian from Connecticut drive down! The more the merrier 🙂 What can I say? Librarians –we’re all inclusive!
  • As school librarians we embrace STEM/STEAM/STREAM learning; never forgetting the Arts or, our bread & butter, Research.

I’m happy to be part of something so amazing. Please view some of the day’s events at www.slimemakerexpo.com and at Twitter @SLIMEexpo (#SLIMEexpo).


This slideshow requires JavaScript.